
Post originally posted March 5th 2016 at www.sitbackwithme.com
I got interested on baking sourdough bread after a while living abroad in Norway away from the delicious Finnish rye bread. For me rye bread has always been the fundament of breakfast. It has beautiful sour taste, it keeps stomach full for hours and not for least, it stays fresh and delicious for long time. As a benefit for taste comes the fibers and nutrients of rye flour – they are sovereign when compared to wheat.
The basic principle for preparing any kind of sourdough bread is simple but requires time. Just to be sure that you understand that baking sourdough bread really requires time I repeat it. You need time and patience. First you need to prepare sourdough starter and keep it alive by feeding it in relatively constant intervals. If you are lucky and one of your friends is making sourdough bread you can ask to get a piece of his or hers living sourdough starter. This way you don’t need to spend time on preparing your own. After you have successfully prepared you starter can you move into pre-dough or often called “leaven”. Leaven is the fundament of your dough which is prepared often one day before the actual dough. Function of leaven is to really boost the bacteria activity in the sourdough starter which will eventually give “lift” for the dough as well as beautiful and vibrant taste to the bread. Leaven is used to build the final dough but as the most cleaver readers might expect, there is more waiting ahead. To really build the texture and taste you will need to give time for the dough to rest and build up strength. This time varies between hours and days. For the traditional Finnish rye bread in this blog post the dough is “bulking” or resting for 12-24 hours. Now you probably start to get what I meant with patience and time, but don’t worry, most of the steps really take only few minutes and after baking few loafs of bread you won’t even notice that you are feeding your root as part of the daily morning routine or mixing a leaven on Friday evening right before heading out just to ensure you can bake a fresh loaf for Saturday.
Simplicity of bread baking is fascinating. All you really need is flour, water and a bit of salt. In right combination and timed order they will create something beautiful and unexpected. Baking is also cheap. For the price of one loaf of bread form the market you will feed entire neighborhood with home made delicious bread.
Rough timeline for this recipe and blog post is following: the first days we will prepare sourdough starter and cultivate and keep it alive by feeding it. Roughly after one week we will prepare leaven and the following day our first loaf of rye bread. For one more week we will continue to cultivate the starter and then prepare a new loaf of bread on week two. For week three we will get a bit experimental and check what other types of sour dough bread we can bake. By the week four you have all the building blocks and knowledge to keep on experimenting and baking any type of sourdough bread you wish! Here is a teaser picture from my last bake: two wheat loafs and two 100% rye loafs.

Now, let’s get into the business.
Preparing sourdough starter
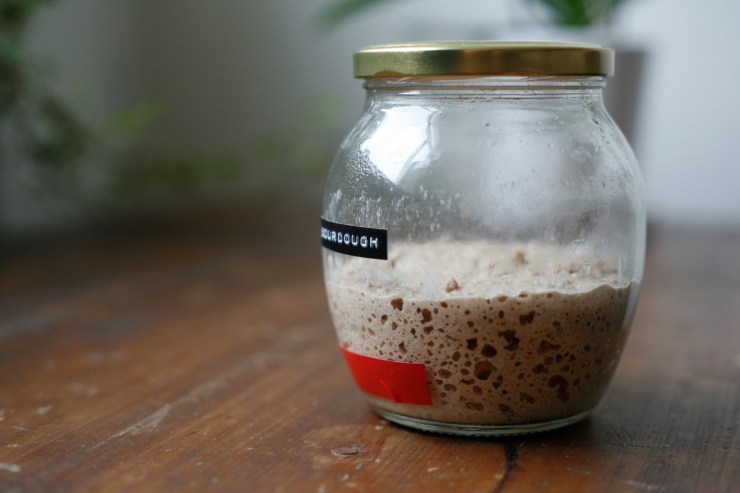
Today we will concentrate on preparing the sourdough starter. I would expect that some of you will see pleasant results already in few days and for some it might take a week or even few days more. A living sourdough starter is “airy”, full of bubbles, and it smells like yoghurt, pleasantly sour. We will later come back to the smells but trust me, you will smell the difference!
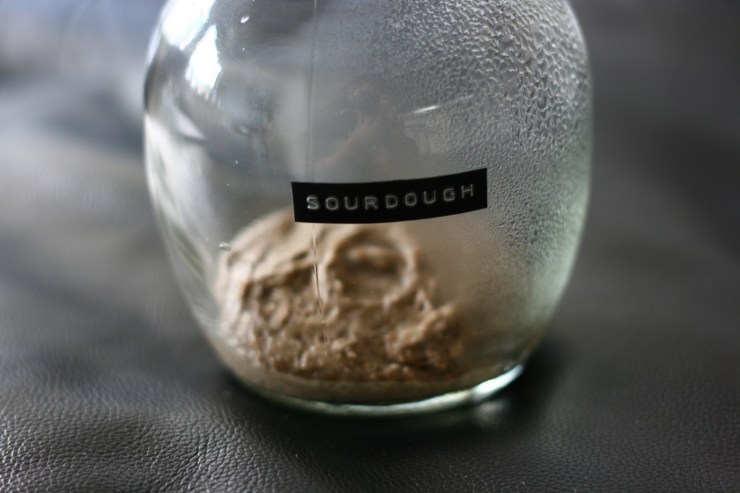
To get started, go and fetch one carefully washed old glass jar, roughly size of 2-5 dl. Glass jar is the best option to maintain your starter because it is easy to store and you can monitor the results through the glass easily. Check that you have full grain wheat and rye flour available. Prepare a 50/50 mixture (for example 4dl wheat and 4dl rye) of these flours into another jar to be used for feeding the sourdough.

Day 1, Sourdough starter.
Mix following ingredients in the glass jar into even mixture:
4 table spoon (40g) pre-made flour mixture
0,5 dl (40g) of room temperature water
Store the starter your just made in a warm place. Perfect places to keep your starter are on top of refrigerator or floor with heating. Tomorrow we will check for progress and continue with the next steps.
Voilà, you have officially started your journey to become master of self made bread.
Since sharing is caring, it would be fantastic to hear which parts of the world are following this blog post and what kind of progress you are experiencing. All questions, comments and feedback are also more than welcome. Comment below or in SitBackWithMe Facebook and welcome to the common journey!
Day 2 – Maintaining sourdough
Mixture of flour and water yesterday, living organism today. Even that you might not yet see it, your sourdough is alive. Its the bacteria that gives sourdough its fine flavor and you want to cultivate and boost that bacteria activity as much as possible. As all living organisms, your sourdough gets hungry and requires feeding. Keeping sourdough a live and blooming is the most important thing in sourdough baking. More often you feed it, more bacteria activity you will have and thus more lift and taste to your bread. Daily feeding sounds demanding, but sourdough is actually super robust. Forgetting to feed for few days is no problem. I have actually dried and frozen sourdough and both have survived. Sourdough just gets less active if not maintained properly and you might need few days of daily feeding to get it blossoming again.
Sourdough maintenance routine
Today you will learn the 40-40-40 feeding routine that I use daily for my sourdough. It is always following:
Remove and through away part of your sourdough so that you are left with 40g in the jar.
Add 40g room temperature water that has been “oxygenating” in bottle or jug
Add 40g of premade rye – wheat flour mixture
Mix into smooth and even paste and clean the sides of the jar so that you can visually follow your sourdoughs activity. Place into warm place and hope for good bacteria activity tomorrow!
If you do not happen to have kitchen scale don’t worry. You can easily follow more simple rule:
Discard half of the sourdough by removing all sourdough from for example left side of the jar
Add water so that it fills the side where you removed sourdough
Add flour mixture until your sourdough is stiff and firm paste
For few days we will follow this daily feeding routine. I am sure some of you will see good results by Day 3 or Day 4 and for some it might take longer time. Next weekend we will make first loaf of bread so stay tuned and feel free to share pictures and comments here or in Facebook.
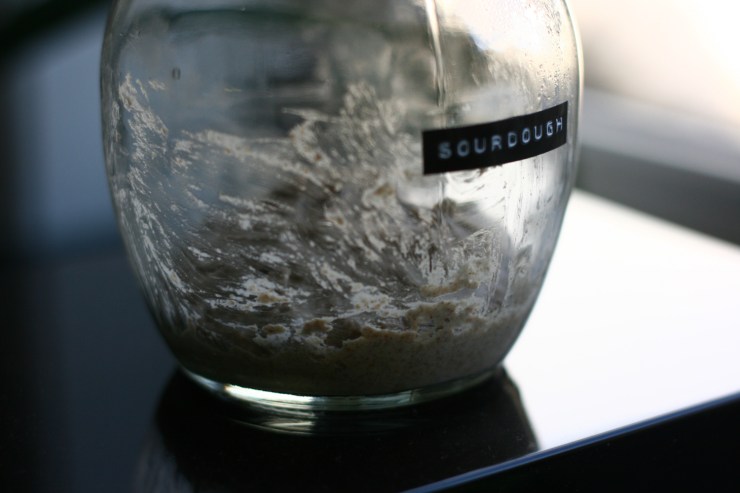
Day 3 – she’s alive!

 Yes, she is alive and going strong. Great progress already on day three. Nice small bubbles all over the sourdough and strong bubbles bursting from the top. Smell is very sour and even a bit alcoholic. Once your sourdough matures the smell will start to resemble yoghurt or sour milk when properly maintained. Mature sourdough’s “well being” can be smelled. If the smell is too much alcoholic has the bacteria used all of their food and there will be no more expansion. Instead the sourdough will start to create alcohol. This is a sign you have forgotten to feed your sourdough, your feeding cycles are too long, it has been in too warm temperature or you have not given enough food in comparison to the remaining sourdough.
Since we are now just getting our starters ready for first bake and today’s task is only to feed your sourdough I can use the opportunity to present my first own sourdough. I made it four months and she is blooming! You can expect similar results within few weeks already so stay patient!
So today and tomorrow, just do the daily sourdough starter maintenance routine and monitor the activity in your starter. You can play a bit with the quantities if you feel your starter is too fluid or too stiff. We will check progress again later this week and get ready for our first bake next weekend!
Day 4 – building strength
Its now fourth day for our sourdough and I am pleased how the sourdough is developing. Now the sourdough is showing good strength and activity and the smell is getting a lot better. There is only very minimal alcoholic smell and the sourdough is starting to smell sweet and very much like yogurt. We are definitely getting closer to starting our leaven and eventually getting to bake our first loaf.
Now that you have been experimenting with the feeding procedure you probably have noticed that you sourdough might look a lot stiffer or liquid than mine. That is perfectly normal, you need to adjust the amount of water and flour according to your climate and flour type. Also if you are not seeing progress, try to leave more old sourdough and add a little less new flour and wise versa, if your sourdough is exploding out of the jar you can calm it down by removing more of the old sourdough. It is all about finding the balance that works best for you!
To test our starter I placed a piece of tape on the side of the jar level with fed starter. I am hoping to see tomorrow good expansion.

So, remember to feed your sourdough and don’t be afraid to adjust the flour to water ratio to fit your own environment
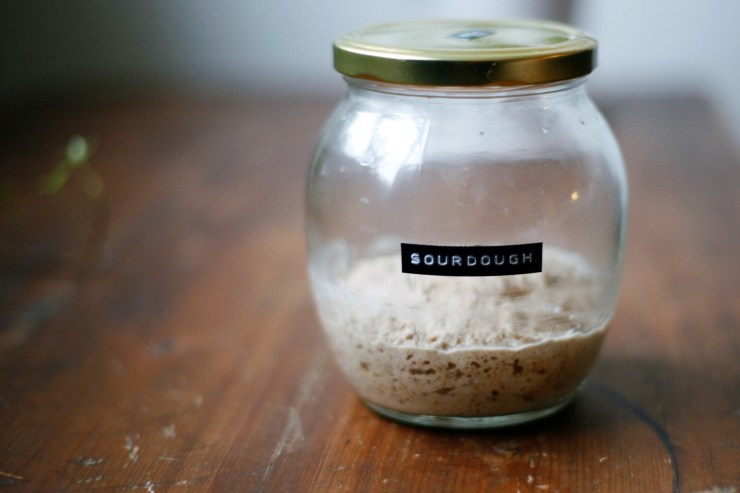
Day 5, sourdough is ready!
Hurray!! Our sourdough is ready! It has over doubled its volume and I am very pleased. Now we just need to maintain it with the same feeding routine until one day before we want to bake our first loaf. I am hoping to bake on Saturday so Friday I am going to prepare leaven. Tune up and let me know how you are progressing!
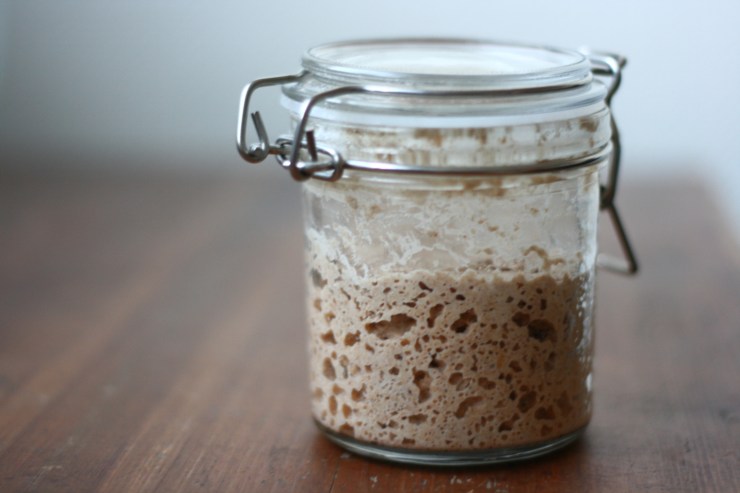
Day 7 – preparing leaven
Depending on how successful you have been with the sourdough starter you have most probably gotten it to strong shape by fifth or sixth day. Now we can move to the second phase on sourdough baking – the leaven. As earlier said, leaven is like a pre-dough. It’s reason is to make sure you have a good sour base to start preparing your dough. Leaven is prepared one day before dough and hence two days prior to baking! So for Sunday bake you need to remember to prepare leaven on Friday evening. It is very simple, here we go.
Preparing Leaven for Rye Sourdough Bread – for two loafs
On a large bowl mix all ingredients and store in warm place over night
50g strong sourdough starter
100g water
100g 100% Rye flour
Remember to also feed your remaining sourdough starter. Adjust the amounts of water to the remaining sourdough. If you are not going to bake again next week you can leave your sourdough into fridge now. This will make the sourdough slow down and it is enough to feed it every two or three days. Before next bake, reserve two or three days for normal feeding routine to get the sourdough blooming again.
Day 8 – preparing dough
Finally it is time to bake, or at least prepare the dough for tomorrows bake! Preparing dough for 100% rye bread is very simple compared to wheat or any combination of flour types. Rye flour is very low on gluten, that means it will not become elastic and it will not expand as much as wheat would do. Here is how the leaven looks like right before starting to prepare the dough.

Rye bread dough – two normal sized loafs
On a large bowl mix following ingredients:
~220g leaven (This is how much you should have prepared yesterday)
400g water
600g 100% rye flour
Let the dough rest for few hours in room temperature and add:
16g (~6ts) salt mixed into tiny amount of water (2cl)
Mix well and set the dough into fridge for 24 hours. It is important that we do not “over prepare” the dough or otherwise we will end up with a large leaven again. The cold fridge will slow down the bacteria activity and ensure smooth sour taste. Tomorrow smells like fresh bread! I suggest you to reserve some good quality butter, salmon and red onion to go with your first rye bread!
Day 9 – Baking time!

We are just few hours away from tasty home made sourdough bread!
Preheat over as warm as it gets. Mine goes only to 250 C (480 F) so that is what I am using. Leave one oven tray into the oven so it heats up as well and that way we have warm surface to bake on. While oven is warming we can shape the sourdough bread. Now that the dough has been “bulking” in fridge over night it has formed air bubbles inside. We want to be as gentle with the dough as possible. No hard pressing or folding at this point. Simply divide the dough into two and with tiny help from wheat flour form two equal sized loafs. Rye dough is very sticky and as previously explained it has almost none of the elasticity that wheat dough would have so do not worry if your dough feels sticky and messy.

I prefer this long form for rye bread because there is a lot of surface area and I just love the taste of crust. It is also easy to cut into slices and it does not get dry when storing. If you have digital thermometer place it in to the loaf so that the measuring stick is right in the middle of the loaf.
Now that the loafs are ready and oven should be warm slide the baking sheet on the warm oven tray and place on the lower section of the oven. Start timer and if you are using digital thermometer set the desired temperature to 99 C (210 F). Rough estimate for baking time is around 50 minutes but depending on your oven and dough it can vary a lot! Kick back and relax for twenty minutes and enjoy the smell that starts to build up in your kitchen. After 20 minutes of baking turn the oven to 225 C (440 F) and continue baking for another 20 minutes.
After the bread has been 40 minutes in the oven it is time start evaluating how ready it is. If you are using digital thermometer you can just follow the inside temperature and the color of the crust. Your bread is ready when the inside temperature hits 99 C but you can adjust the color and thickness of the crust by either increasing the temperature and letting moisture out or just continuing at 225C oven door closed. If you are baking without the digital thermometer you can follow the color of the crust same way and you can also knock on the bottom of the bread to check if it is ready. When you hear hollow sound when knocking on the bottom of the bread it means the bread is fully baked from inside as well.
Once bread is fully baked remove it from the oven and set on a grid to cool down. Try to keep your hands off from the bread for at least one or two hours. This way the bread will cool down slowly and the moisture inside will slowly make its way out to the crust. If you cut it open too quickly the moisture will escape too quickly and your bread might get dry very soon.
Serve with good butter and remember to share the crusty ends with friends. In our family those are the best treat!
As a teaser for next weeks bake I also baked wheat bread. Maintain your sourdough and stay tuned for delicious wheat sourdough bread next weekend!


Leave a comment